Sunday, December 9, 2012

Advent Calendar - Tree


I always love the cute little advent calendars and I wanted to make one.  I found this wood Christmas tree at Hobby Lobby and picked it up for next to nothing since it was half off.  I thought I might be able to use this as an advent calendar.  The tree had pre-drilled holes in it for lights, but I decided to put little dowel rods in the holes.  Then I purchased some small muslin bags and with heat transfer paper I printed out numbers and ironed them on to the bags.


I filled each bag with a tiny ornament that could be placed on the tree once the bag was opened.  The kids are having a great time opening up the bag each morning to see which ornament is inside.


Sunday, November 25, 2012

Wreath of the Season

I have a few things to post, but just haven't found time to get the pictures taken and uploaded.  You might start seeing some very random posts in the next few weeks.  Since we are all getting into the Christmas spirit. I thought I'd show you the newest Christmas wreath I created.  I used my favorite type of ribbon, Deco Mesh.  This wreath was made for a local fundraising auction.


Sunday, November 11, 2012

Biplane Painting


I FINALLY finished this painting.  It's been sitting on my easel since this summer.  I made a point to get it finished this weekend.  I wanted a big painting and decided to make the biplane stretch across 3 canvases. To give you an idea on the size it's 6' wide by 2' tall.  It's for my son's room.  He is a typical boy who loves airplanes, trains, cars, dinosaurs, etc. I decided to go with the airplane theme.  My mom is working on airplane quilts for his room.  They are going to be fantastic!  I also have my husband working on dressing up his closet doors with molding.  I can't for the room to be all done.

Friday, November 2, 2012

Pumpkin Carving

This year the kids made pumpkin carving more complicated.  They wanted them to actually look like something.  I wasn't getting away with the standard jack o'lantern.  The requests were Sleeping Beauty and Spiderman.  Thankfully, I was able to track down a pattern to use for each of them.  The Spider-man was a little more difficult since the pieces were so close together.  I only ended up cutting out the eyes and the remaining I just dug out most of it, but left the inside intact for stability. I have to say that they resemble the characters I was trying to create.


Sunday, October 28, 2012

Firestar Costume

This year for Halloween my daughter requested to be Firestar.  Her brother is going to be Spiderman.  I love that they like to dress up as a pair. As you remember last year they were Jessie and Woody from Toy Story.


This was definitely going to be a handmade costume since this cartoon aired back in the 1980's.  My daughter is discovering many new to her cartoons thanks to Netflix.  

To make this costume I used a white unitard and dyed it yellow. As you can find in my previous post. To make the flames I used a knit jersey material in red and orange colors.  It needed to be a stretchy material for it to work with the stretchy unitard. I was able to use the sewing machine to piece the orange and red material together, but the flames had to be hand sewn to attach it to the unitard.  At that time I added some sequins to the flames.  For the most part the costume is complete.  All that is left is the mask.  That will be my next post. 


Tuesday, October 23, 2012

Fabric Dyeing

I have never dyed anything. I found it a little intimidating, but once I did it I can't figure out why I thought it would be so difficult.  I did have to use an acid dye since the fabric I was dyeing was 100% nylon. I found the dye online at Dharma Trading Co.


I dyed it on the stove top in a big stainless steel pot.  I didn't want to try it in my washing machine since I have a front loader and I wasn't sure how to go about adding it into the washer.  Once I put the fabric into the dye it just soaked it up.  Wow!  It turned out exactly the color I needed for an upcoming Halloween costume.  After it sat on the stove in the pot for 30 minutes I rinsed it several times and hung it up to dry. It turned out perfectly.


Wednesday, October 10, 2012

Too early for Christmas...

As you can see at all the craft stores, Christmas has been here since July and it's all on sale.  In preparation for some upcoming silent auctions I started to make some Christmas wreaths.  Here's the first of the wreaths I made for an auction coming up in a few weeks.  I'm auctioning off a 2 hour interior design consult and decided to add a wreath as an eye catcher to get them to stop and bid.  I hope it works!


Tuesday, October 2, 2012

New Mirror

I've been slowly accessorizing parts of my house.  It takes a while for me to find the right things and then of course there's the expense.  I'm always looking for a good deal.  I hate paying full price for anything.  I've been finding some really great things at Home Goods which is part of Marshall's.  I felt like my bedroom needed something over the bed even though the headboard was tall.  It just didn't look complete to me.  I found this great mirror at Marshall's for $50 and it was exactly what I wanted.  The mirrors I saw elsewhere where 2-3 times what I paid for that mirror.  It's definitely a place to check out if you want some great accessories or accent furniture.


Monday, September 10, 2012

Deco Mesh Wreath

I've been seeing more of the Deco Mesh wreaths and decided to make one for myself.  It's a great material to work with since it provides volume and holds it shape.  I made myself a Texas Tech wreath for the college football season.  What I used for a base of my wreath was a plain wire wreath frame with pipe cleaners and made myself something similar to a "work wreath". Then I used the pipe cleaners to attach the deco mesh to the wreath.  There are already some great tutorials on youtube showing you how to make deco mesh wreaths so, you won't need one from me.


Tuesday, September 4, 2012

Class Project - Cross

This year the class project is a cross.  I've been racking my brain to come up with something that we could have each child participate in the project, but be able to take it apart and give everyone the piece their child made.  I figured that way we could all pitch in to raise the money instead of one person bidding on the project and having to pay for it.  A suggestion was made to do hand prints on a canvas of a cross.  I thought maybe we could do individual canvases and make a cross.  Now it's going to be a big cross since we have 17 kids, but we are disassembling it later, so I think it will be okay.  I hope the class and school goes for it.  Here's the canvas I did this weekend with my daughter. The hand prints form a heart in the middle and I love the way the rainbow colors turned out.  My daughter couldn't decide on one color and wanted a rainbow.  


The quote I found via the internet.  It says, One hand to guide and hold. One life to shape and mold.  Each child a gift of God above.  A symbol of his strength and love. 

Monday, August 27, 2012

Paper Carnations

My daughter started school last week and we thought it would be fun to make some paper flowers for the teacher. I found this fantastic tutorial from Folding Trees.  It was a great project to do with my daughter.  The paper carnations turned out so realistic and pretty.


Monday, August 20, 2012

Lampshade Revival

I bought these two lamps 10 years ago and the shade is made from paper.  They held up just fine before kids, but the kids haven't been too kind with them over the past few years and they had tears in them.


I like the lamps and the shades are an unusual shape, so there wasn't a way for me to find replacements.  I opted to recover them myself with a cream colored fabric.  You can't tell from the pictures, but it's a diamond design with dots.  I measured the shade and cut the fabric out and hemmed the edges.


Next I hot glued it to the lampshade frame.


Then I trimmed the edges with double fold bias tape in a taupe color to give it a bit of contrast.


Sunday, August 5, 2012

Moroccan Wall Stencil


I decided to try out the stencils by Cutting Edge Stencils.  I went with the Rabat Allover stencil and used it as an accent wall in my entry way.  I love the way it turned out!  This project did take some patience since I needed to put three coats of the brown paint on the wall, but otherwise it wasn't difficult.  I like the idea of wallpaper, but not the fact that its such a pain to remove later if you get tired of it.  This is much better, so when I'm tired of this color or pattern I can just paint over it.


Sunday, July 22, 2012

Vintage Truck Painting

Another painting finished for a sweet little boy.


Monday, July 16, 2012

Pajamas for Dolls

I had a request by my daughter that her doll needed a pair of pajamas.  Um, sure I'll get right on that, but the constant nagging got to me and I caved.  I wouldn't want her doll to sleep in her regular clothes or (gasp) in the nude.  Now that my son is a little older he has to have exactly what his sister wants which means he has a baby doll too and that baby needed pajamas.  I wasn't getting away with just making one set of pajamas, but two sets. Luckily, I had a pattern for doll clothes and it consisted of 6 pieces (2 sleeves, 2 pieces for the front and 2 pieces for the back).  The hardest part was putting the zipper in and even that wasn't as bad as I thought it was going to be.


Monday, July 9, 2012

Men's Vest

Here's another post about the 1920's party we went too.  My husband needed something for his outfit and we decided to go with a vest.  It's so hot here in Houston and I didn't want him to have to wear a suit jacket so we opted for the vest. I used the pattern Simplicity 2346 and went with style B.  It was an easy pattern and didn't take much time at all to make.  I found a great pinstripe suit material and it worked with the pants he already had and the fedora hat that he picked up at Target.  It was such an inexpensive addition, but it really made the outfit.


Friday, July 6, 2012

Out of Space

I had no idea that I'd eventually run out of space here on the blog.  I'm a little picture happy and well once you use your space you either buy more or lower the quality of your pictures.  We are in the process of doing the latter of the two.  So, hang tight I'll be back with some more projects soon.

Monday, June 25, 2012

Squirrel Painting

The squirrel painting is the last of my little woodland creatures.  I was amazed at how fast this painting came together. This one is my favorite.


Here they all are together. 

Tuesday, June 19, 2012

1920's Headpiece


We went to a really fun 1920's party that our neighbors hosted.  The flapper dress was made by my mom back when I was in college.  The only thing lacking in my costume was a headpiece.  I wanted something pretty and sparkly.  I waited till the last minute to work on this, so I headed over to the craft store and picked up a few jewelry pieces that I could combine.  The top piece is a beaded bracelet and the piece in the middle is a pendant.
First, I cut out a circle out of thin cardboard and wrapped it in black fabric.  Then I hot glued the bracelet in a U-shape on to the fabric covered cardboard.  I had a bit of a problem gluing the pendant since the surface was no longer flat with the bracelet attached.  I made a spacer out of a bottle cap and glued it on and it worked perfectly.  Once the front was done I attached an alligator clip to the back.  I found the cute beaded headband at the store and clipped the two together.  I loved the way it turned out and received compliments on it all night.  


Here's a picture of my husband and I dressed up in our 1920's outfits. We had a great time!


Monday, June 18, 2012

Meadowlark Painting

Another painting complete, a meadowlark. I'm not sure why I thought this would be easy to paint.  It turned out to be more difficult than the other two woodland creatures I painted.  


Thursday, June 14, 2012

Bunny Painting

I just finished 3 paintings for a nursery.  Here's the first of my little woodland creatures, a bunny.


Monday, June 11, 2012

Nursery Design

I have a few design projects going on and I thought I'd show you one of them today.  This is for a friend of mine who is expecting a baby boy.  There isn't a theme, but we've been working with sort of a Gulf of Mexico/Nautical theme. The color palette is mainly shades of blue, green and light neutrals.  To give the room a pop of color we are thinking of painting the Ikea dresser green.  I think the room is going to turn out so cute!


Friday, June 8, 2012

Swing Table


When I first saw this table, an image of 8 adults sitting or should I saw swinging around this table while having some sort of business meeting came to mind.  It cracked me up.  The swing table was designed by Duffy London.  If you go to their website you will see all sorts of creative furniture, lighting and accessories on their website.

Thursday, June 7, 2012

Blongo Ball


So, I can't take any credit for this project.  It was all my husband's handiwork. This game is called many names, Laddergolf, Blongo Ball, Bolo Ball or Polish Horseshoes.  We call it Blongo Ball.  He made this game to entertain the adults, but the kids loved playing it just as much.  It was all made from PVC pipe and fittings. Then each tier was sprayed with paint specifically for plastic. We purchased the blongo balls and went with the soft kind since I knew kids would be throwing them around as well.


At some point I'll get around to posting a project I completed.  I finished two projects recently and gave them away before I photographed them.  I should have some paintings up next week for you all to see.

Saturday, June 2, 2012

Kindergarten Graduation

My little girl graduated from Kindergarten this past week and I can't believe this year went by so quickly.  It just amazes me that she'll be a first grader next year.  Where does the time go?  Now I just need to find a way to keep my kiddos busy this summer.  I see many days filled with swimming at the pool, riding bikes and heading to the beach to play.  I promise I'll get some projects done and keep blogging.  I'd just like to make sure we all have a little fun before she heads back to school in the fall as a first grader.  Yikes!


Lily with the Principal and Father Nguyen

Lily and her Kindergarten teacher.

Monday, May 21, 2012

Camping Birthday Party

I've been completely neglecting the blog lately because of all the end of the year school stuff.  Doesn't everything seem busier the last month of school?  Of course we also threw a birthday party into that mix as well.  As you've seen in my previous posts, we were gearing up for a Camping Birthday Party.  My daughter loved it and even told me that it was the best birthday party ever before she fell asleep.  Aww, it makes all the work worth it.

Here is a picture of the tents that we set up in the backyard.  The kids loved running in and out of them.  My parents made a fake fire using a light, fan and cellophane.

I went with picnic type table cloths on all the tables. 


Here are the twig covered pots that I made and used as centerpieces.  


I made a little clothesline with pictures from previous years. 

The awesome cake that Moeller's Bakery made.  My daughter loved it! It has a Fisher Price camping set on top of the cake. My mom and dad found this and had them added to the cake.  They had these really cool candy rocks on top of the cake.  The kids loved them.  

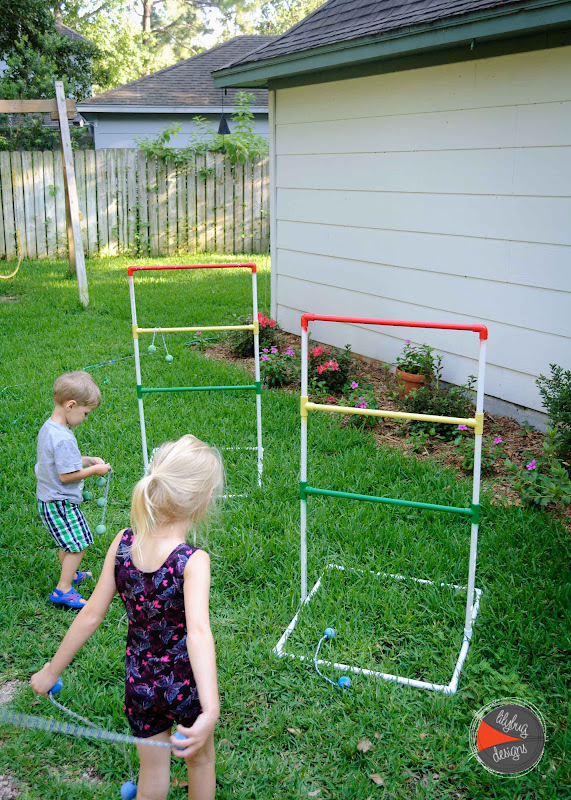
The kids made pet rocks.  They also had a bug hunt at the beginning of the party with fake bugs. 

The enjoyed running around with their binoculars that I made for them. 

They all took a whack at the Bee Hive Pinata.


My favorite part was the musician that came to sing.  Andrew is fantastic and he has such wonderful children's songs.  You should check him out at his website, here
It turned out to be a fun party and I am so glad my daughter went with the camping theme.  The boys and girls from her class really seemed to enjoy it.