Today I thought I'd show you the living room of our house. This room has been a work in progress and really the only thing it is lacking is a mantel and a new rug. First I'll show you the before pictures.
You might not be able to tell from the pictures, but it had wood paneling that was painted. The reason we literally took this room down to the studs was because we were getting rid of our awesome 1970's wet bar and turning it into a half bath. I say "we", but it was really my husband, brother and dad.

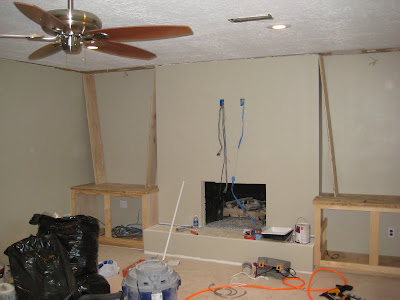
The picture above shows the walled up pass-through from the wetbar. This meant we would have to get rid of the paneling. It was very sad. Can you tell I was disappointed? The fantastic part about taking this room down to the studs was that we were able to add more wiring for electrical and lighting. We had such little light in our living room that it was pathetic! Then of course it worked out nicely to mount our TV above the mantel since we framed out the fireplace. The brick on the fireplace wasn't anything special. It was painted white and we found out that it wasn't any prettier underneath the paint. So, I opted to have it framed out and sheetrocked. That way the upper cabinets could be recessed in the wall. Here's the before picture.
In Progress
After Picture
As you can see from the picture we added granite for the hearth and fireplace surround. It really is silly that we even have a fireplace since we live in Houston and it rarely gets cold enough to use a fireplace. The granite installation was the only task we hired out. Everything else was a DIY project done by either us or with the help of our family members. Thank you to my family for all their help!
This was an enormous project to take on ourselves, but it was a great learning experience. Here's a list of everything that was done.
1. Take down paneling
2. Add more recessed lighting & electrical.
3. Center the fan in the middle of the room.
4. Frame out the fireplace.
5. Sheetrock the walls.
6. Texture the walls.
7. Build new cabinetry.
8. Add molding and trim (crown, base, door frames).
9. Replace closet door.
10. Paint walls, trim and cabinets.
11. Granite installed by a subcontractor.
12. Rip out the carpet.
13. Install engineered wood floors.
Now to show you more of the after pictures.


